INTRODUCTION
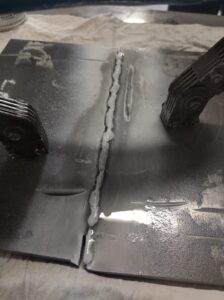
Due to its strong impact on the material properties, welding has posed, more than any other production process in the workshop or on site, the need to carry out accurate checks of all the preventive conditions of the materials, techniques and human resources used. The quality of a product in which there are welding operations can be conveniently pursued only if each activity has been suitably planned. It is therefore necessary that all the operational functions involved in manufacturing and control are coordinated.
Based on the aforementioned considerations, it is easy to understand how for several decades the Quality Control of welded constructions has included, in addition to the actual control of the finished weld, preliminary tests and checks, as well as partial checks during construction.
Welding Quality Control can be divided into two categories:
– Indirect Controls: to be carried out ie before construction, before welding is carried out;
– Direct Controls: to be performed during construction and / or after the welding has been carried out.
INDIRECT CONTROLS
Indirect Controls mainly involve the revision of the following documents:
– Certification of Welders (WPQ, Welder Performance Qualification): to ensure that the workforce employed in the execution of the welds has the necessary operational skills;
– Certification of the Welding Procedure (WPQR, Welding Procedure Qualification Record): to be sure of obtaining healthy joints with the required mechanical characteristics;
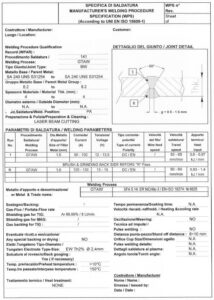
– WPS, Welding Procedure Qualification: operating instructions that indicate how the welding should be performed in terms of current intensity, shielding gas, feed rate and so on. It arises from the qualification ranges and is validated by the corresponding WPQR;
– Various types of technical documentation: drawings, 3.1 or 2.2 certification of the base material and the filler material.
Welding must therefore only be carried out by qualified personnel and using qualified procedures.
Procedures qualification standards vary according to the field of application and the material to be welded.
The main reference standards in this area are:
– Qualification tests for welders: UNI EN ISO 9606-1 / 2/3/4
– Operator qualification tests: UNI EN ISO 14731 (Welding coordinators), UNI EN ISO 14732 (Mechanized and automatic welding operators), UNI EN ISO 13585 (Brazing workers),
– Certification of the welding process: UNI EN ISO 15614
In the United States, the ASME Sect standards apply. IX
DIRECT CONTROLS
The so-called Direct Controls include all Non-Destructive Tests (NDT) that are performed to obtain the information necessary to evaluate the acceptability of a welded joint without causing breakage, fractures or any other significant change of the structure itself.
The execution of the NDT must be carried out by experienced and certified personnel according to UNI EN ISO 9712.
The most industrially used and widespread non-destructive tests to inspect welds are the following:
SURFACE CONTROL:
– Visual Test (VT)
– Examination with penetrating liquids (PT)
– Magnetic particle examination (MT)
These checks are considered to be of the superficial type, ie capable of identifying defects present on the surface of the weld.
CHECKS ON THE ENTIRE THICKNESS:
– Control by ultrasound (UT)
– Radiographic control (RT)
The latter, on the other hand, are considered volumetric tests, capable of identifying defects present within the weld. They are in fact used for full penetration welding.
VISUAL TEST (VT)
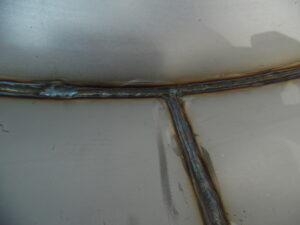
The Visual Test of the welds is carried out according to the UNI EN ISO 17637 standard, while the acceptability criteria are contained in the UNI EN ISO 5817. As a non-destructive test, the visual test plays a fundamental role since, although it is the most natural and apparently simple, it requires a great predisposition to observation and above all considerable experience, to be able to draw all the information potentially available and obtain concrete results. These will then be compared in relation to the acceptability ranges of ISO 5817.
This type of control allows to detect specific surface and / or dimensional characteristics such as: misalignments, displacements, wrong shapes and sizes, surface state, presence of slag, presence of splashes, cracks, porosity, blowholes and so on.
Also for the welds, the visual examination is divided into:
– Direct examination: if there is no interruption between the operator’s vision and the weld to be checked. However, it can be carried out with equipment such as mirrors, lenses, gauges, profilometers;
– Remote examination: if there is an interruption between the operator’s vision and the weld to be checked. It is generally done with boroscopes, endoscopes, robotic systems or television systems.
EXAMINATION WITH PENETRATING LIQUIDS (PT)
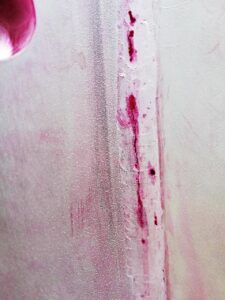
The control of welds with penetrating liquids is carried out according to the European standard UNI EN ISO 3452-1, while the acceptability criteria are contained in UNI EN ISO 23277. This control is based on the “penetration capacity” of these liquids, that is the possibility of entering narrow discontinuities such as cracks, porosities, fissures, etc., emerging on the surface. The penetrant contained in the discontinuities can be highlighted by using a suitable absorbent detector. The control with penetrating liquids, due to its reliability and simplicity of execution, is one of the most used methods in many industrial fields. The control can be performed with two different detection modes: color contrast (red penetrating liquids) and fluorescent; for each of the two, different types of penetrating liquids can be used having different chemical – physical characteristics and consequently different degrees of sensitivity. This check can be carried out on any type of material as long as it does not have an excessive surface roughness.
MAGNETIC PARTICLE EXAMINATION (MT)
The control of welds with magnetic particles is carried out according to the UNI EN ISO 17638 standard, while the acceptability criteria are contained in UNI EN ISO 23278. The technique exploits a particular characteristic of ferrous alloys: ferromagnetism, that is the property of some materials, said ferromagnetic materials, to magnetize themselves very intensely under the action of an external magnetic field and to remain magnetized for a long time when the field is canceled, thus becoming magnets. Near a discontinuity, such as a microcrack, the flux lines of the magnetic field deviate locally and create, at the edges of the defect, an anomaly of the same field. If the defect emerges on the surface, part of the flow lines are dispersed beyond the surface itself; to highlight the defect it will be sufficient to spray the surfaces with suitable suspensions of ferromagnetic, colored or fluorescent powders. The particles will concentrate by lining up along the flux lines of the magnetic field and will be made visible. The maximum detection sensitivity is obtained when the discontinuity is intercepted with the lines of force of the magnetic field oriented perpendicular to it. This type of check can only be carried out on ferromagnetic materials so it will be impossible to inspect materials with austenitic matrix such as stainless steels (eg 304, 316 etc.).
CONCLUSIONS
Welding is a complex process that has a strong impact on the mechanical properties and metallurgical characteristics of metals. For this reason we have seen how the Quality Control of the welding is well structured, also including real preliminary checks. In this case we talk about Indirect Control, as all the documents and technical qualifications essential to obtain good quality welded joints are mainly checked. Direct control of welds was then introduced, which provide for the application of NDTs to assess the presence of defects. In this article we have described the superficial methods.
In the next article we will talk about the volumetric methods used for the Direct Control of welds.

